|
Hi readers, It's been a while hasn't it? I almost completed a writing course that has been taking up a lot of time and since all of my creativity has been going in that, I haven't been creative otherwise. Except for this dish I made tonight for our Sunday dinner...sort of. This morning I was watching Food Network and Giada, one of my favorites, was on cooking some light dishes. The dish she was making looked SO good. I didn't know if I was just hungry or wanted to try something new. It was called Fusilli with Sun-Dried Tomato Vinaigrette. Here is the link to Giada's recipe: http://www.foodnetwork.com/recipes/giada-de-laurentiis/fusilli-with-sun-dried-tomato-vinaigrette.html Since I have to cook with many substitutions it can be hard to follow a recipe. For this one I only had to substitute the pasta for a gluten-free penne, and I also cut the recipe in half. Hope you enjoy! 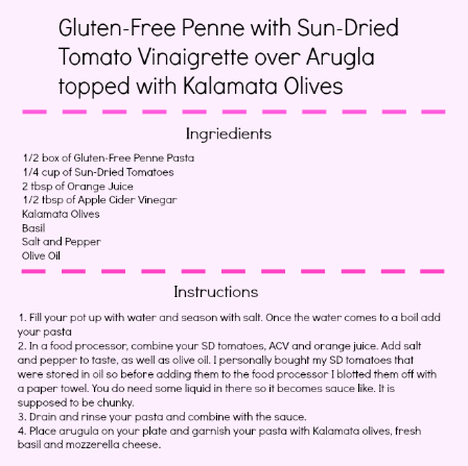 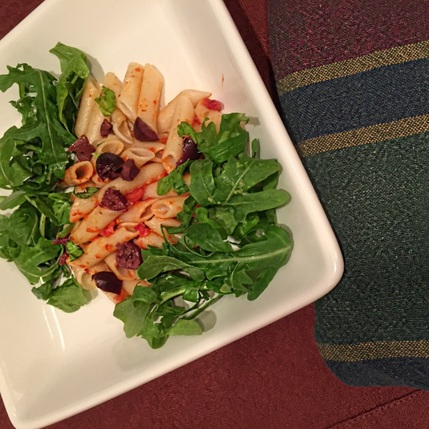 Gluten-Free Penne with a Sun-Dried Tomato Vinaigrette over Arugula topped with Kalamata Olives and Basil I hope you try this dish, either Giada's way or my variation. I'm normally not a fan of arugula but in this dish it did off set the acidity in the vinaigrette. Light taste of the tomatoes with the slight fruitiness of the orange is perfect and the bite of the peppery arugula is yummy. Thanks for taking the chance to look at my page. Also follow me on Facebook: https://www.facebook.com/SincerelyMichelle and on Instagram: michellelobrace
Sincerely, Michelle.
0 Comments
Hey guys! As I promised, I'm writing about the Halloween countdown I posted on Instagram and what you'll need for it! Overall, it was a pretty easy project. If you don't mind spending some time at Michael's or A.C. Moore you should be able to get all of the items to make this countdown! Below I'll write what you need to make this as smooth as possible.  What to purchase...if you don't have this stuff already
How to Make Your Countdown 1. Have your clean baking pan and two pieces of your base scrapbook paper ready. Measure the paper up to the pan. You will have to cut the paper to adjust to the size of the pan. I used about a piece and a half of black paper. Once cut, I used double stick tape to connect to two pieces.
2. Next, have your overlay piece of paper ready. If you can, go outside and spray the spray adhesive on the back of the paper. You can always put a piece of cardboard behind it so the front doesn't get sticky. *Remember BEFORE sticking the paper down, there needs to be room for the words on the top and bottom! Put the overlay on top of the other paper. 3. Place the papers onto the pan and use the detachable magnets on all four corners. They are heavy duty and it keeps the paper in place. 4. Punch out the letters and use double sided adhesive foam square dots to attach to the paper. You can write Halloween Countdown, Countdown to Halloween, Days 'til Halloween, etc! 5. Set all your numbers up to make sure you have enough! I had to run back to the store because I forgot day 18, oops! Cut and stick some of Alene's magnet tape on the back of the numbers. You don't have to stick magnets, but I wanted to be able to move them. If you want them in place you could probably use a glue gun or a heavy duty glue. 6. Find your Halloween stickers and make sure you have 31! It can be hard to find 31 cute Halloween stickers, so if you are having trouble look at scrapbook paper, they will have bats, ghosts, etc that you can cut out and use instead. You can look at cards or decorations as well. Once you have the stickers apply Alene's magnetic adhesive tape to the back. It is important to use a heavy duty magnet because it will not go through all the paper and it will slide down the pan. Also if you use Alene's, each year you can put different figures on different dates or change them out if you find new ones. 7. Lastly, on each day choose your figure to place on the date! ----------- I really hope these directions made sense! If you have any questions please feel free to comment below or contact me through the contact page. I want to make this easy and fun for you to do by yourself, with friends or your kids! I hope everyone enjoys! Sincerely,Michelle Follow me on Instagram at: michellelobrace Hey guys, Yesterday I was CRAVING some french fries. I never eat them out because they are basically disgusting. Filled with fats, grease, dipped in the same fryer as fish or chicken. I like to make my own food to ensure that I will not get a stomach flare-up. Cross-contamination happens enough in a household, I could only imagine in a restaurant. At home I can control my settings! Anyways, I baked my fries in the oven mainly because I don't have a fryer but it is so much healthier. I also wanted something spicy so instead of making spicy fries, I opted for a spicy sauce. Hope you enjoy! 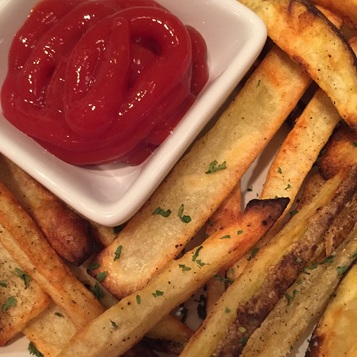 Homemade Crispy Seasoned Fries with Sriracha Ketchup Prep time: Cook time: Total time: 35 minutes 40 minutes 1hr 15 minutes Ingredients 1 potato Garlic, Parsley, Salt & Pepper to taste Ketchup Sriracha Olive oil 16 oz of Water Instructions 1. Wash and dry one baking potato. I decided to keep the skin on, if you prefer to peel it you can. Cut the two ends off of the potato. Slice into 1/4 inch strips.
2. Once cut, place the strips into a bowl and cover with water for about 30 minutes so the starch releases from the potato. The longer you soak, the crispier they will bake. However, if you plan to soak for longer than 30 minutes place in the refrigerator. 3. Preheat the oven to 400 degrees (F). After you soak the potatoes, dry them off with a paper towel and try to soak up all the moisture. Take 2 baking pans and crinkle a sheet of foil to put on the pans. 4. In another bowl put the potatoes in and drizzle some olive oil and sprinkle salt, pepper and garlic powder. Toss around to coat the potatoes. Once coated place the potatoes on the foil covered baking pans. Make sure the strips don't touch each other, you want them to cook evenly. 5. Bake in the oven for 30 minutes at 400 degrees. Feel free to check them and flip over if needed. 6. Turn the oven up to 425 degrees and bake for about another 10 minutes to brown. Please check often! All ovens are different and I don't want them to burn on you! 7. Take out the pan and add more salt, pepper and garlic to taste. You can add fresh or dried parsley. For the Sriracha Ketchup 1. Squeeze some ketchup into a small bowl. Just use however much you plan on using. Shake in some sriracha and taste. Tasting helps you to see if it's spicy enough. If it's not spicy enough add more Sriracha, if it is way too spicy, add more ketchup. 2. You can scoop it onto your plate or put into a squeeze bottle to store and serve neatly. I hope you all enjoy this recipe. I know getting fries at a fast food restaurant or from the freezer section of the grocery store take a MUCH shorter time than these, but they taste so so so much better and they are better for you. Sincerely, Michelle. |

Michelle
BEAUTY. FASHION. LIFESTYLE. 
Archives
March 2020
  |
 RSS Feed
